How to clean a sump pit
An afternoon, once a year. It is also the only time you will ever get a proper look at the parts that keep your basement dry.

To clean a sump pit: unplug the pump, pump the basin out with a utility pump, lift the pump out and rinse it outside, scoop and vacuum the silt from the bottom of the basin, scrub the walls, inspect the check valve and the float, put it back, refill with a few gallons of clean water, and test it with the lid off before you seal up. Allow two to three hours, once a year — more often if your groundwater carries iron.
It is worth doing on its own merits, but the real value is the inspection. This is the only time anyone looks at the float, the intake screen, the check valve and the basin, and three of those four are things that fail silently.
What you need
- A utility pump with a garden hose, or a wet/dry vacuum with reasonable capacity
- A bucket, a trowel or a small scoop, and a stiff brush
- Rubber gloves, eye protection and old clothes — pit sludge smells and stains
- A hose or a bucket of clean water for rinsing the pump outside
- A flashlight, to actually see the bottom of the basin
- Optionally a new check valve and a grommeted lid, if yours are old or absent
The procedure
- Unplug the pumpAt the receptacle, not at the switch. If a battery backup shares the basin, disable that too, or it will start the moment the level rises while you are working.
- Pump the basin downDrop the utility pump in, run its hose to a floor drain or outside, and empty the basin. A wet/dry vacuum does the same job more slowly. Take it down as far as the pump or vacuum will go.
- Disconnect and lift the pump outIf the discharge has a union check valve, unscrew it; otherwise release whatever coupling is fitted. Lift the pump out — it may be heavier than you expect, especially cast iron — and set it on a tarp or carry it straight outside.
- Clean the pump outsideRinse the housing and the intake screen with a hose. Clear anything wrapped around the impeller. Check the cord for damage along its whole length and look at the float for free movement and for grit in its hinge or on its rod. Do not run the pump dry to test it.
- Scoop the sludgeGet the solids out with a trowel and a bucket before you reach for the vacuum — a shop vacuum full of wet silt is heavy and awkward to empty. Expect a layer of fine silt and, in iron-bearing groundwater, an orange gelatinous slime — if that is what you are finding every time, read the best sump pumps for iron ochre before you replace anything.
- Vacuum and scrubVacuum the remaining fines, then scrub the basin walls with a stiff brush and clean water. Do not use bleach: it attacks pump seals and impellers and the chlorine smell simply replaces the original one. Rinse and vacuum again.
- Inspect the basin and the inletsWith the basin clean and lit, look for cracks, for soil or gravel entering through a split, and for the drain-tile inlets around the rim — those should be clear, not packed with silt. A cracked basin lets grit in continuously, which is what wears impellers out.
- Test the check valveHold it vertically and pour a little water in from the outlet side. It should hold. A hard, torn or jammed flapper means the discharge column falls back into the pit after every cycle, and this is the moment to replace it.
- Reinstall the pumpSet it back on the basin floor — on a brick or the manufacturer's stand if it is designed to sit raised — reconnect the discharge with the check valve the right way round, and confirm the float has clear swing room on all sides with nothing for it to catch on.
- Refill with clean water and testPour in several gallons until the float lifts. Watch the pump start, watch the level fall, watch it stop. Then wait thirty seconds: if it restarts, the check valve is missing, backwards or failed. Go outside and confirm water is arriving where it should.
- Leave the right amount of water in, and close upDo not leave the basin dry. A few inches of clean water keeps the pump cool on its next run and maintains the water seal over the soil beneath the basin. Then bolt the lid down with the pipe and cord through their grommets.
Superior Pump 91250
A 1/4 HP utility pump at 120 V and 1.5 A that takes a garden hose and will pull a basin down far further than the sump pump can.
#ad we earn a commission · Amazon shows the current price
| Type | Submersible utility pump, thermoplastic |
|---|---|
| Horsepower | 1/4 HP |
| Electrical | 120 V, 1.5 A |
| Motor | Thermally protected split capacitor |
| Flow, by lift | 1,800 GPH at 0 ft |
The first step in cleaning a pit is emptying it, and the sump pump cannot do that — it is designed to stop with several inches still in the basin. A utility pump with a hose run to a floor drain or outside takes the basin down to a skim in a couple of minutes.
This is also the single most useful thing to own for the day something goes genuinely wrong, which is why we keep recommending it. See sump pump vs utility pump for why the two are not interchangeable.
What it gets right
- Takes a standard garden hose — no plumbing, no adapters to source
- 1,800 GPH at zero lift, which empties a basin in minutes
- Light enough to carry in one hand down basement stairs
- 1.5 A draw, so an ordinary extension cord is adequate
- Earns its keep again on the day the basement actually floods
Where it falls short
- No float switch — you stand there and unplug it
- Thermoplastic housing and a short duty cycle
- Will not pull the last inch out; finish with a wet vacuum
Specifications from Superior Pump 91250 product listing.
Zoeller 30-0181 check valve
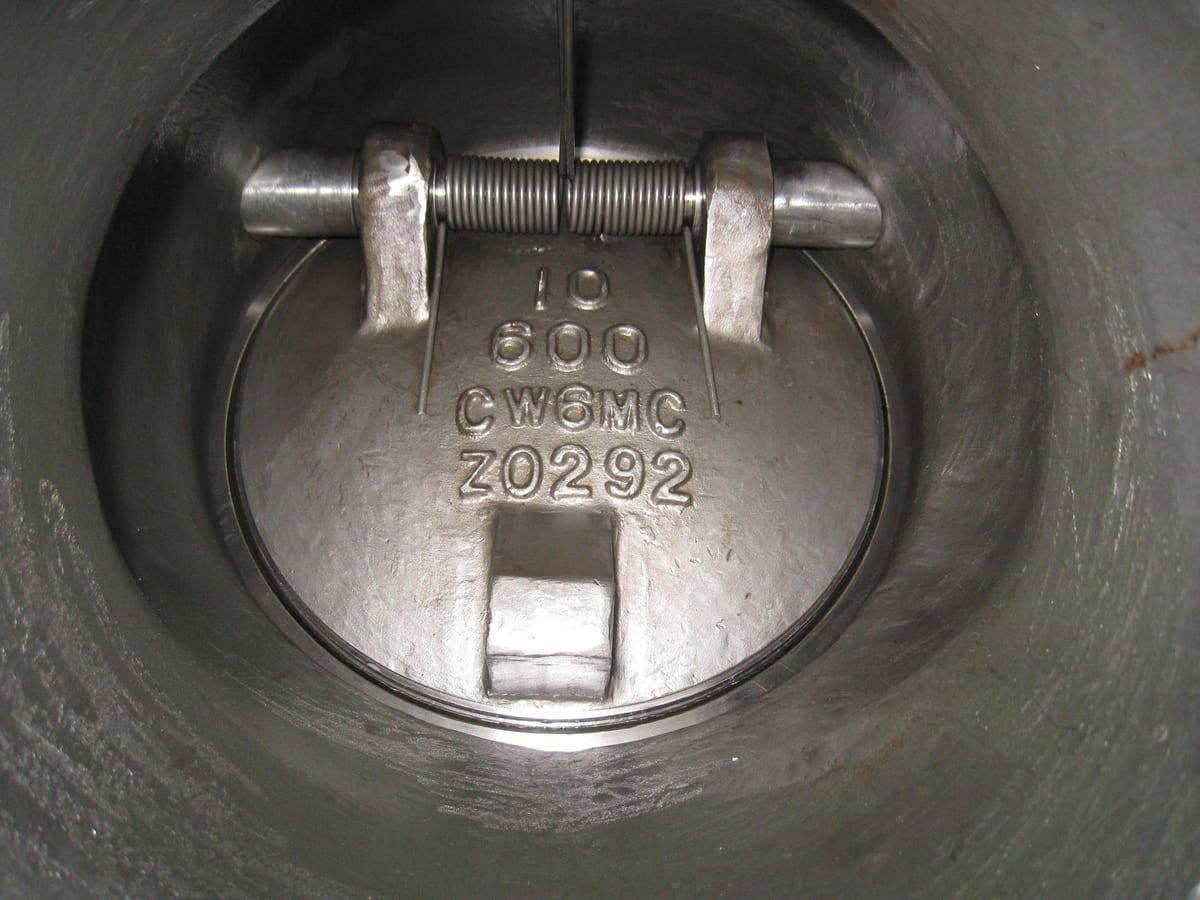
A union check valve with a flexible flapper — the component most likely to have quietly failed since the last time anyone looked.
#ad we earn a commission · Amazon shows the current price
| Type | PVC union check valve with a flexible flapper |
|---|---|
| Size | 1-1/2" slip x slip union, fits 1-1/4" and 1-1/2" pipe |
| Orientation | Vertical or horizontal |
| Noise | Flapper bends over a radius rather than slamming a hard seat |
While the pump is out of the basin, test the check valve. Hold the valve vertically, pour a little water in from the outlet side, and confirm it does not pass. A flapper that has gone hard, torn, or lodged open lets the discharge column fall straight back into the pit, and the symptom — a pump that restarts a few seconds after it stops — is easy to mistake for a switch fault.
What it gets right
- Union body unscrews for inspection without cutting pipe
- Fits 1-1/4" and 1-1/2" pipe, so it suits almost any residential discharge
- Flexible flapper bends over a radius instead of slamming
- A failed valve is the most common cause of short cycling, and the pit clean is when you will spot it
Where it falls short
- Small permanent head loss
- You have to break into the discharge to inspect the old one
Specifications from Zoeller check valve distributor listing.
Jackel sealed sump pit cover
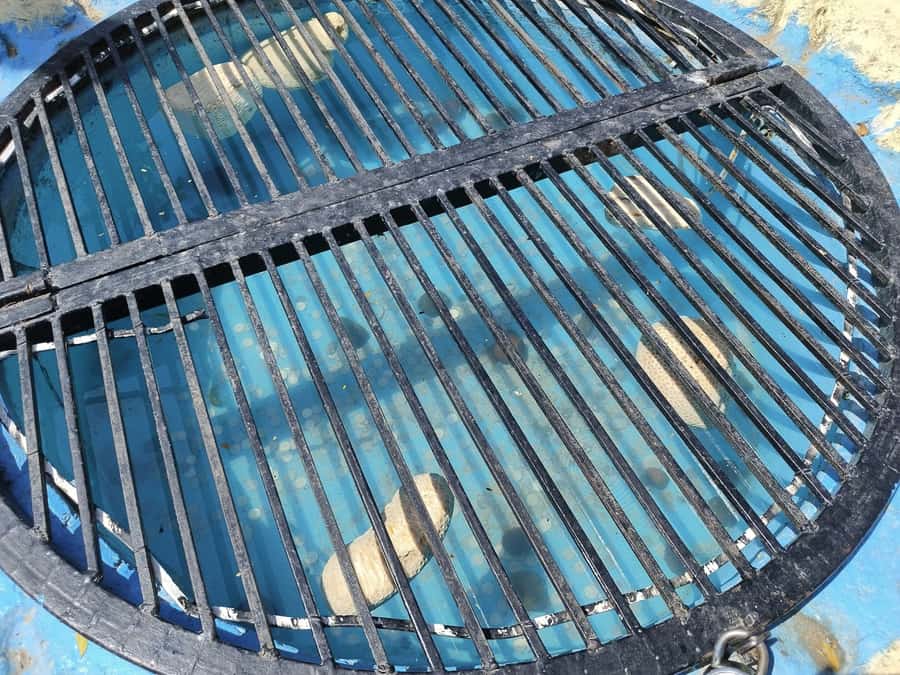
A bolt-down cover with grommets, which keeps debris out and stops the basin evaporating into the room.
#ad we earn a commission · Amazon shows the current price
| Type | Bolt-down sump pit cover with pipe and cord grommets |
|---|---|
| Fits | Basins with pre-drilled rim inserts, 18 in class |
| Why it matters | Keeps debris, pets and children out, and cuts pit humidity and odor |
If the pit you just cleaned had no lid, fit one before you close up. Much of what you spent the afternoon removing arrived from above, and a sealed cover also addresses the two other problems an open pit causes: humidity and smell.
What it gets right
- Keeps falling debris, dust, pets and children out of an open hole
- Grommets for pipe and cord, so the seal is continuous
- Cuts pit humidity and the odor that comes with a stagnant basin
Where it falls short
- Must match the basin rim pattern
- Comes off for service, so do not over-tighten
Specifications from Amazon listing (search).
How often, and what the pit is telling you
| What you find | Interval | What it means |
|---|---|---|
| A thin film of fine silt | Annually | Normal. Keep to the schedule |
| Orange gelatinous slime | Twice a year | Iron bacteria in the groundwater. Harmless but it clogs intakes |
| Sand and gravel | Investigate now | The basin is probably cracked, or there is no liner |
| Mud filling the basin | Investigate now | Surface water or soil is entering, not groundwater |
| A dry basin | Add water today | The water seal over the soil has gone — see the odor guide |
| Standing clear water, no silt | Annually | A healthy pit. You are doing fine |
The sand-and-gravel row is the one to act on. A basin that keeps filling with grit is feeding abrasive material through the impeller and the seal every time the pump runs, which shortens its life by years rather than months. The fix is the liner, not the pump.
While you are in there, check these too
- The float, for free movement and clearance. Most sump floods start here. If a float has stuck before in this pit, the pit is too tight for it — see vertical vs tethered float switch.
- The cord, along its full length, for abrasion where it passes the rim.
- The discharge, outside. Confirm the outlet is clear and still pointing somewhere sensible — where to discharge sump pump water.
- The backup battery, if you have one. Age it against its install date rather than its appearance.
- The water alarm. Test it with a cup of water; a dead battery in an alarm is silent in exactly the way an alarm must not be.
Questions people ask
How do I clean a sump pit?
Unplug the pump, empty the basin with a utility pump or wet vacuum, lift the pump out and rinse it outside, scoop the solids from the basin bottom, vacuum and scrub the walls with clean water, inspect the check valve and float, reinstall, refill with a few gallons of clean water and test it before you bolt the lid back down.
How often should a sump pit be cleaned?
Once a year for most pits. Twice a year if your groundwater carries iron, which shows up as an orange gelatinous slime that clogs intake screens. If you are finding sand or gravel in the basin, that is a cracked liner rather than a cleaning interval and it needs investigating now.
Can I put bleach in my sump pit to clean it?
No. Bleach attacks pump seals and impellers, and the chlorine smell simply replaces the original one for a few days. Clean the basin mechanically with a scoop, a vacuum, a stiff brush and clean water, then fit a sealed lid to keep it cleaner.
Why is my sump pit full of mud?
Mud rather than fine silt usually means surface water or soil is entering the basin rather than groundwater arriving through the drain tile. Look for a cracked liner, a missing liner, an uncovered pit taking debris from above, or surface water running into the pit area. The pump is not the problem.
Should the sump pit be empty after cleaning?
No. Refill it with a few gallons of clean water. The residual water keeps the pump cool on its next run and maintains a water seal over the gravel and soil beneath the basin — a bone-dry pit is a common cause of a sewage-like smell in a basement.
Sources
Read next

Sump pump maintenance checklist
Twenty minutes a year, split into four short visits, is the difference between a pump that reaches ten years and one that fails at six.

Sump pump clogged: finding the blockage
Three places block, and they need three different responses. Working out which one costs nothing but a few minutes.
How to test a sump pump
Five minutes, four times a year. The half of the test most people skip is confirming that the pump stops.

Sump pump smells like sewage
Four causes, and only one of them means what you are afraid it means. Work through them in this order.
How long do sump pumps last?
Seven to ten years is the honest range. What decides where you land in it is duty cycle, pit size and the switch — not the badge.
The best sump pumps for iron ochre
Orange slime in the pit is a living thing, and it will find the cheapest moving part in your sump system. Buy for solids handling and a switch it cannot seize.